Build your VIROO Application
The experience of building VIROO content is comparable to building a traditional Unity application.
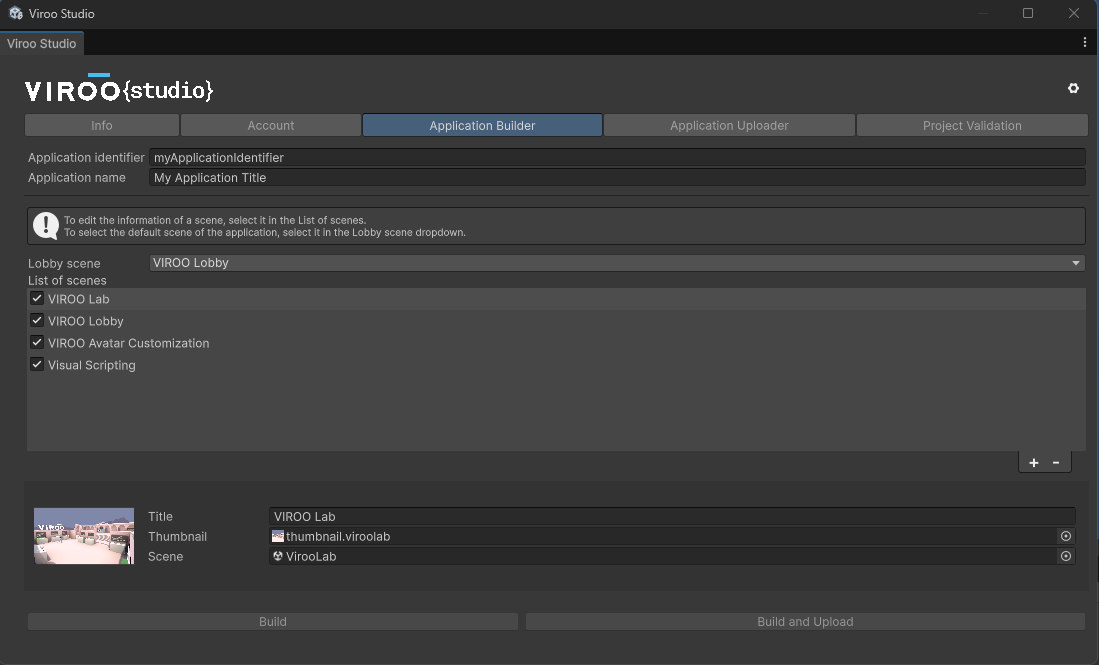
You can open the Application Builder window going to Window -> Viroo -> Dashboard and then navigating to the Application Builder tab.
In this window, you need to configure your application's identifier and name, and define the scenes it includes.
Note
To Build a VIROO application, you must be logged in the Account tab.
Target application
Before building a VIROO application, a corresponding application must first be created in VIROO Cloud.
The build window includes a drop-down list containing the available applications from VIROO Cloud. The list displays applications that don't yet have a file uploaded or an application that matches the identifier set in the window's identifier field:
- When the drop-down list is enabled, you can select the VIROO Cloud application to which the Unity application will be linked.
- When the drop-down list is disabled and an application is already selected, the link was established during a previous build and can't be changed.
This association is required because the build process retrieves encryption keys from the selected cloud application. These keys are then used to encrypt the generated Unity application.
Identifier and name
Information used to identify your application. These fields are required.
| Field | Description |
|---|---|
| Application identifier | Used in the VIROO platform to identify the VIROO Application unequivocally. |
| Application name | This is the name that will be displayed to VIROO platform users to identify your application. |
Application languages
This list specifies the languages the application supports. This information in showed both in VIROO Cloud and in the different VIROO Players.
Scenes
You must add the Unity scenes that will be part of your VIROO Application. You can either add scenes by clicking the + button or remove existing scenes by selecting the scene you want to remove and clicking the - button.
Each of these scenes may be enabled or disabled by checking the toggle to the left of the scene. If checked, the scene will be included in the build. This lets you configure scenes and select which ones to include in the application without removing them from the list.
One of the scenes must be selected as the Lobby scene or initial scene of the application. You can select which one of the enabled scenes from the list is the Lobby scene in the combobox over the scenes list.
To edit a scene's information, you must first select it in the list.
For each of the scenes you will have to provide the following fields:
| Field | Description |
|---|---|
| Title | This will appear in the scene selection menu inside your application. |
| Thumbnail | This image appears in the scene selection menu inside your application. This field is optional. |
| Scene | The Unity scene containing the VIROO Scene. |
You can build your VIROO Application by clicking on Build.
When the Unity build process is finished, a Unity executable will be generated in virooapp format. This executable can't be executed in the traditional way, it must be uploaded to the VIROO Cloud and executed from the VIROO Players of the VIROO Platform.
After building the application, check Upload VIROO Applications to VIROO Cloud to upload it to VIROO Cloud.