Creating a VIROO Application
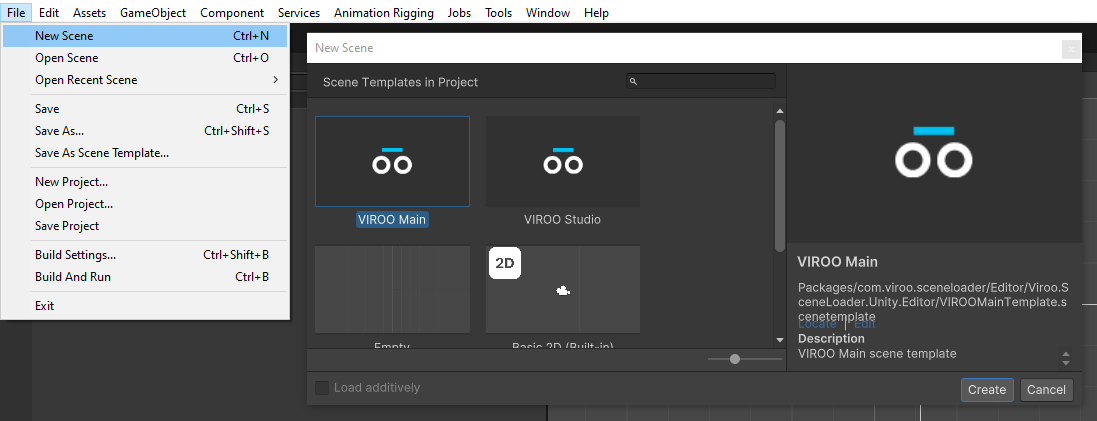
A VIROO application must have an initial scene, VIROO Main, which must be added from a template scene provided by VIROO Studio. The application's own content is added in additional scenes (see Adding Content to your VIROO Application).
In addition, there are some additional settings to make in your Unity project, also listed on this page.
Before you begin: To start creating your first scene, you must have previously configured your development environment. This includes making sure that you are using the correct version of Unity, that you have installed the VIROO Studio package and that you have the project set up correctly. See more information at Set up your Basic Environment.
Add VIROO Main scene
When publishing VIROO Application, the runtime, VIROO Main, must be included in the application. To do so, the following steps must be followed:
- In Unity, go to
File -> New Scene. Select theVIROO Maintemplate and click onCreate.

- Save the scene (
File -> Save). - Go to
File -> Build settings...and add the scene you just created to theScenes in Buildlist, in the first position (index 0).

Note
The scenes that you include in your application do not need to be added to this list, when you publish the application VIROO Studio will take care of including them in the build.
Configure the Application ID
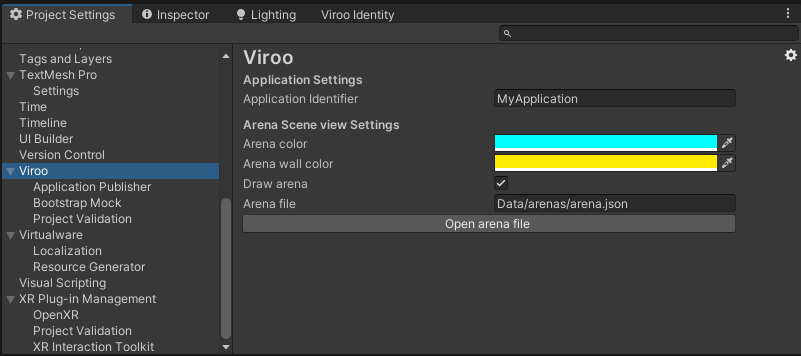
Your application needs to have a unique identifier to function correctly on the VIROO platform.
To set the ID of your application:
- In Unity, go to
Edit -> Project Settings -> Viroo. - Set your application identifier in the
Application Identifierfield.

Configure the Application Title
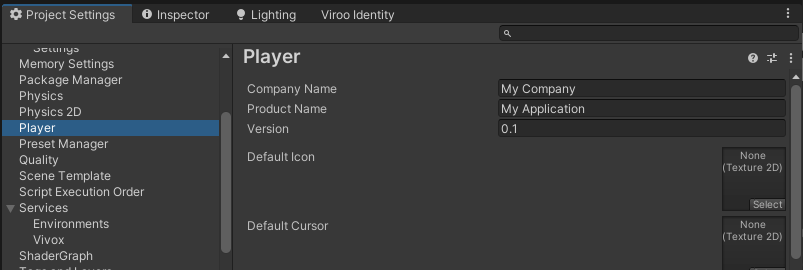
Your application must have a title that allows you to identify it correctly when using it.
To set your application title:
- In Unity, go to
Edit -> Project Settings -> Player. - Set your application title in the
Product Namefield.

Configure Vivox
If you do not want to use Vivox you have to open the scene created earlier with the VIROO Main Template and disable the prefab called VirooVivoxVoiceCommunication and save the changes.

If you want to use Vivox you must follow the steps below:
Open
Edit -> Project Settings -> Services -> Vivoxand follow the steps to link a project from the Unity Dashboard.Create a file named
appsettings.jsoninAssets/StreamingAssetswith the following content:
{
    "Vivox": {
        "Server": "",
        "Domain": "",
        "TokenIssuer": "",
        "TokenKey": ""
    }
}
To get the credentials:
- Go to Unity Dashboard.
- Select the appropriate project (or create a new one).
- Go to
Services -> Vivox Voice and Text Chat -> Credentials.