Standalone support
This article explains what are the settings you have to apply to your project to be able to build for the different standalone platforms.
Unity's target platform needs to be set to Android:
- Go to
File -> Build Profiles. - Select
Androidplatform in the list and click onSwitch Platform(you'll need to install the Android module in case it's not already installed).
VR device support is based on OpenXR, via Unity's OpenXR plugin. Meta support is built in and for other platforms (HTC and PICO) their corresponding plugins must be installed.
OpenXR features and interaction profiles for different Standalone VR platforms are mutually exclusive and they only should have the corresponding OpenXR Feature Groups activated. If you want to build the same project for more that one platform (for example Meta and HTC), you would have to change these settings every time you build.
Note
Hand Tracking Subsystem must be activated too in case you want to use hand tracking in your application.
Adding support to a project developed before VIROO 3.0
To add support for standalone, follow these steps:
- Open the
VIROO Mainscene (if you started from the template, it's located atAssets -> Scenes -> VIROO Main). - Make sure the VirooStandalone prefab is present in the hierarchy; if it isn't, add it.". You can find it at
Packages/Viroo/Runtime/Viroo.Unity/Standalone/Bootstrap/Prefabs/VirooStandalone.prefab. - Save the scene.
Meta
VIROO Studio is already configured for Meta standalone devices. These are the settings needed to build for Meta:
Select the plug-in provider.
- Go to
Edit -> Project Settings -> XR Plug-in Managementand select theAndroidtab. - Select
OpenXRin Plug-in Providers. There should be the only plug-in provider selected.
- Go to
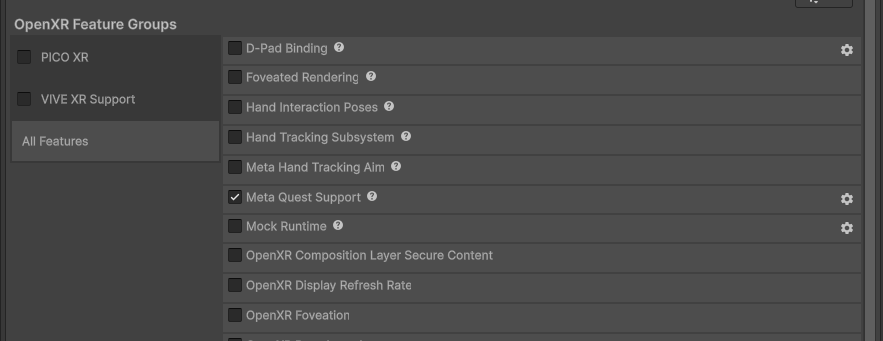
Set up the
Meta Quest Supportfeature group.- Go to
Edit -> Project Settings -> OpenXRand select theAndroidtab. - Verify that the
Meta Quest Supportfeature is checked inOpenXR Feature Groups; if not, check it. - In case you aren't building for Vulkan, in the settings editor of the OpenXR Feature Groups make sure that the
Optimize Buffer Discardsoption is unselected.
- Go to
Select the interaction profiles.
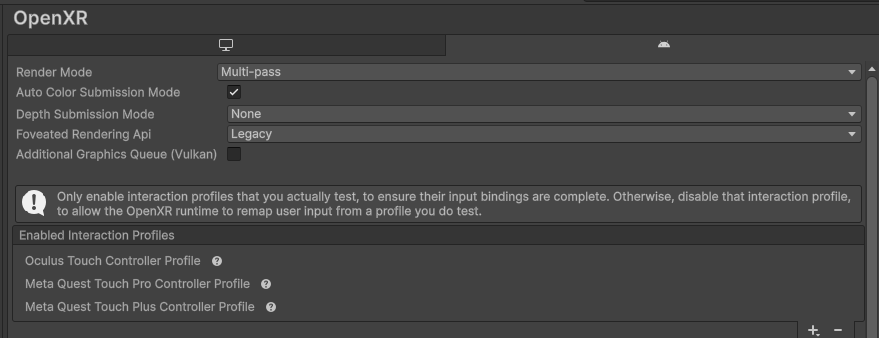
- Go to
Edit -> Project Settings -> OpenXR, and select theAndroidtab. - In the
Enabled Interaction Profilessection, add only the following profiles:Oculus Touch Controller Profile,Meta Quest Touch Pro Controller ProfileandMeta Quest Touch Plus Controller Profile. - Delete any other interaction profiles.
- Go to
PICO
These are the basic steps to configure your project for PICO standalone devices. For more information please refer to PICO documentation.
Install PICO Unity OpenXR SDK following these steps:
Download PICO Unity OpenXR SDK.
- The SDK is available in the following download link
Unzip the content of the file that has been downloaded.
Open the Package Manager (
Window -> Package Manager), inAddsection (the section with a+icon), select theAdd package from diskoption.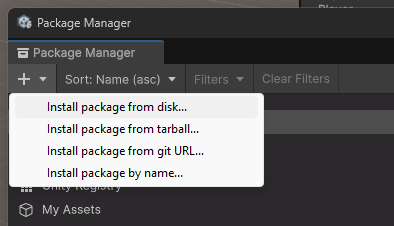
Select the
package.jsonfile that's in the extracted folder.
Configure your project:
Select the plug-in provider.
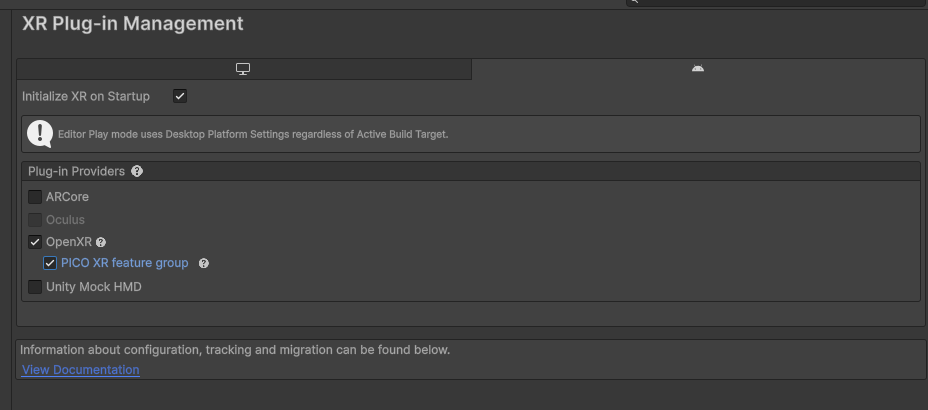
- Go to
Edit -> Project Settings -> XR Plug-in Managementand select theAndroidtab. - Select
OpenXRandPICO XR feature groupinPlug-in Providers. This should be the only plug-in provider selected under OpenXR section.
- Go to
Select the interaction profiles.
- Go to
Edit -> Project Settings -> OpenXRand select theAndroidtab. - Add
PICO4 Touch Controller ProfileandPICO Neo3 Touch Controller Profile. - Delete any other interaction profiles.
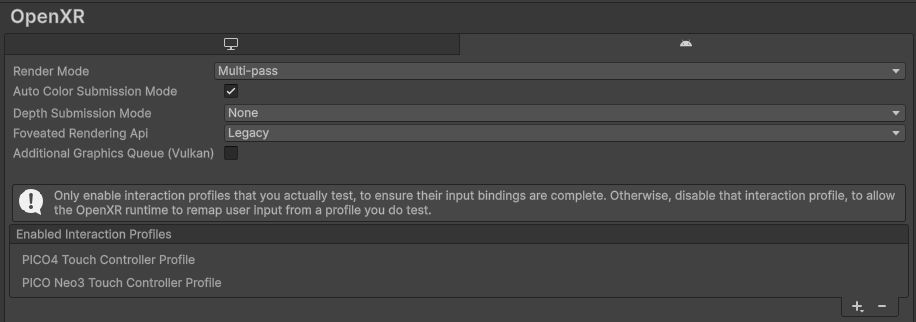
- Go to
Further Player Settings
- Go to
Edit -> Project Settings -> Player -> Other Settings. - In
Renderingsection make sure that theAuto Graphics APIis unselected and that the selected Graphics API isOpenGLES3.

- In
IdentificationselectAndroid 10as theMinimum API Level.
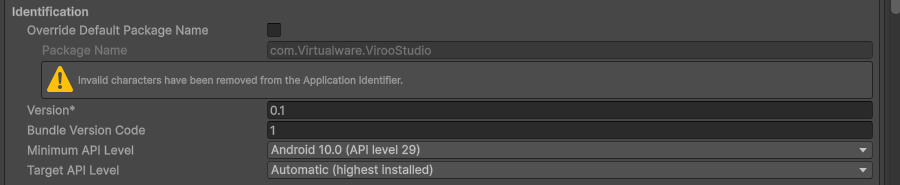
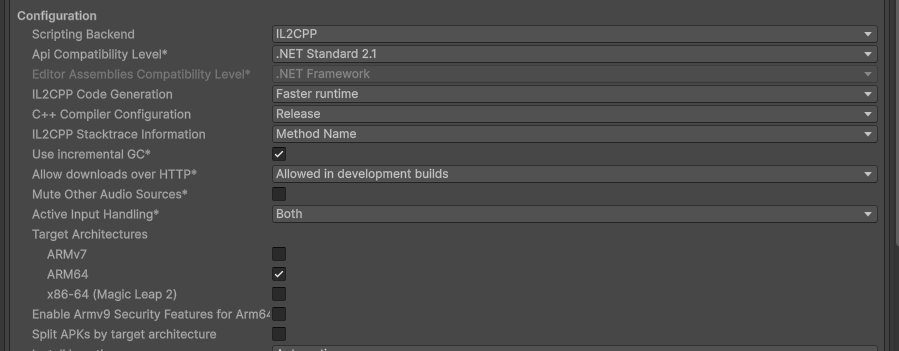
- In
ConfigurationselectARM64as the target architecture.
- Go to
HTC
These are the basic steps to configure your project for HTC standalone devices. For more information please refer to HTC documentation.
Install VIVE OpenXR following these steps:
Download the Vive OpenXR Installer unity package and save it.
Import the file to the Unity Project (
Assets -> Import Package -> Custom Package...).Install the package.
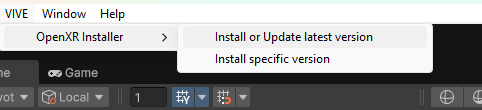
- You will find a menu called VIVE on the Unity UI.
- Select
VIVE -> OpenXR Installer -> Install or Update latest version.
Configure your project:
Select the plug-in provider.
- Go to
Edit -> Project Settings -> XR Plug-in Managementand select theAndroidtab. - Select
OpenXRandVIVE XR Supportfeature group in Plug-in Providers. This should be the only plug-in provider selected under OpenXR section.
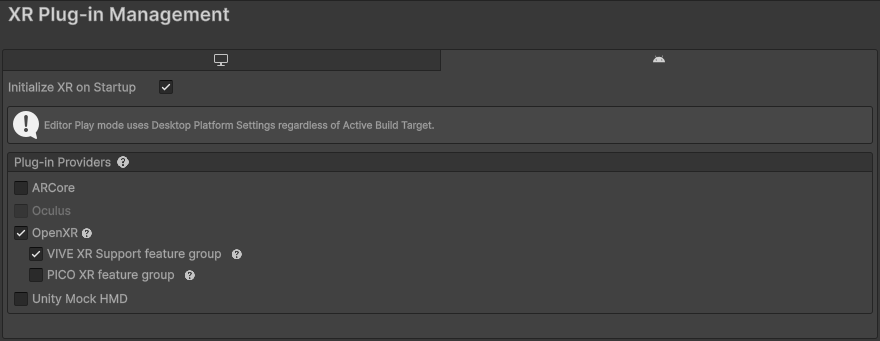
- Go to
Select the interaction profiles
- Go to
Edit -> Project Settings -> OpenXRand select theAndroidtab. - Add
VIVE Focus 3 Controller InteractionandOculus Touch Controller Profile. - Delete any other interaction profiles.
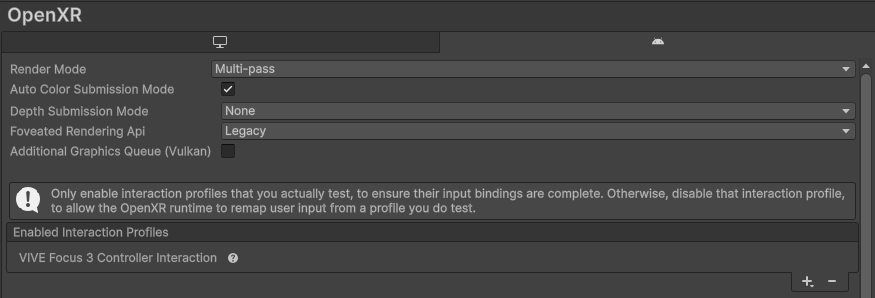
- Go to
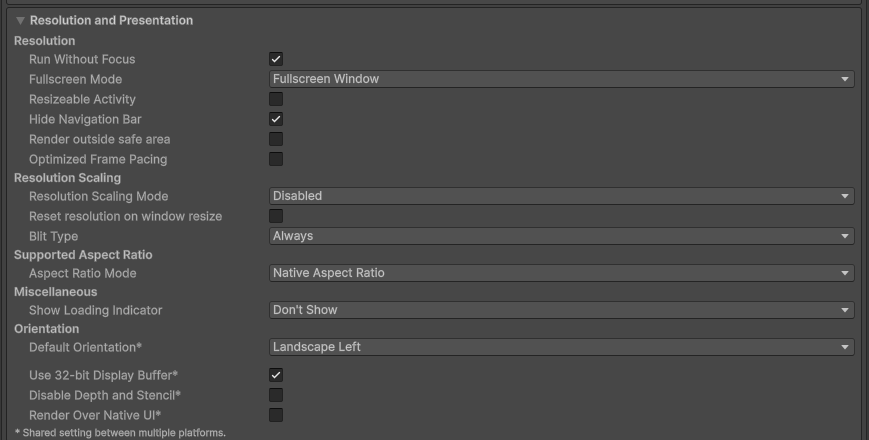
Further Player Settings.
- Go to
Edit -> Project Settings -> Player -> Other Settings. - In
Renderingsection make sure that theAuto Graphics APIis unselected and that the selected Graphics API isOpenGLES3.
- If your target device is a Focus 3, go to
Identificationand selectAndroid 9as theMinimum API Level. - In
Edit -> Project Settings -> Player-> Resolution and Presentation,Default Orientationneeds to be set toLandscape Left.
- Go to