Change Avatar Action
With this action, you can change the visualization of the avatar of the user who triggers this action.
The next steps should be followed to setup a Change Avatar Action:
Create a
PrefabGameObject for the avatar you want to set dynamically.Then, create a new
GameObjectin the scene and add a PrefabAvatarContainer component to it.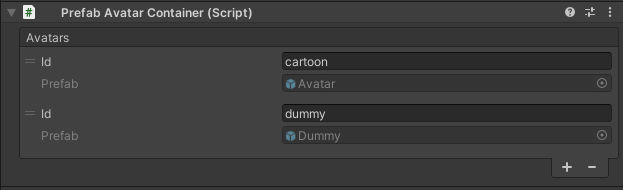
The next step is to setup this component. Add a new entry to the
Avatarslist, pressing the + button. This will bring up the Add Avatar Window where you must setup an id for the appearance and the prefab you setup in the previous steps.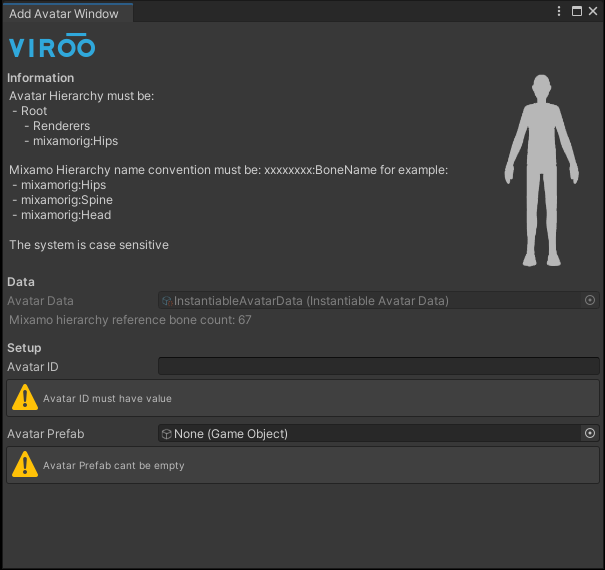
Note
The rig must be compatible with Mixamo's rig hierarchy, this means, that the same hierarchy and naming conventions must be followed. The Add Avatar Window runs validations to check whether this restrictions are met or not.
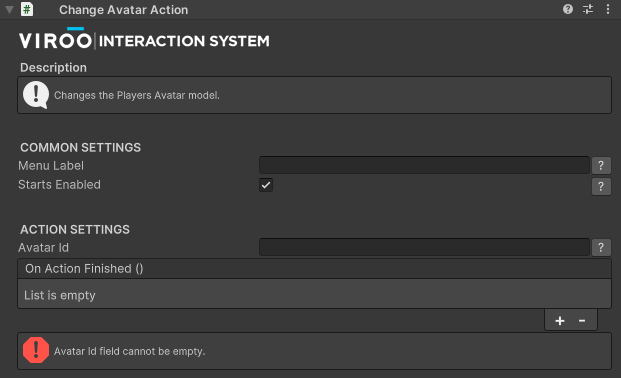
Finally, create another GameObject and assign the component ChangeAvatarAction to it, and configure it so that when it is executed, it changes the user's representation in all their instances in the session, not only locally.
| ChangeAvatarAction | |
|---|---|
| Field | Description |
| Menu Label | If this action is added together with a ShowMenuAction, this is the name that will appear on the menu. |
| Starts Enabled | If the action should be enabled from the beginning, this check box must be enabled, otherwise the action will not be executed. |
| Avatar Id | This is the Id of the Avatar Prefab with which it has been identified in the PrefabAvatarContainer. |
| On Action Finished | UnityEvent that will be called when after the avatar change action finished. |